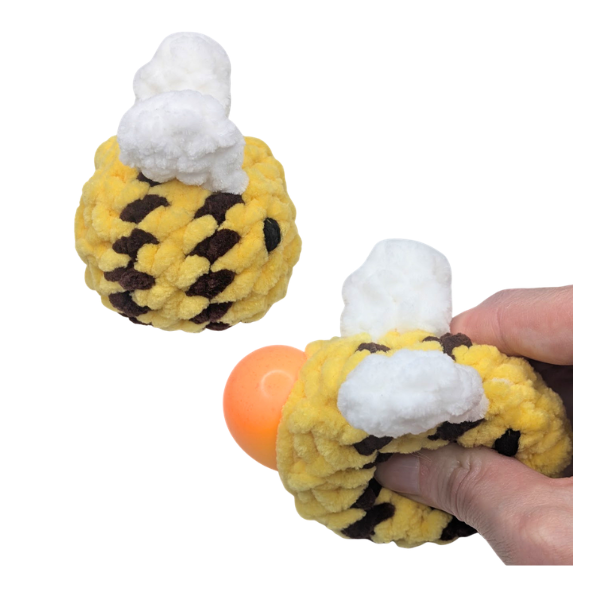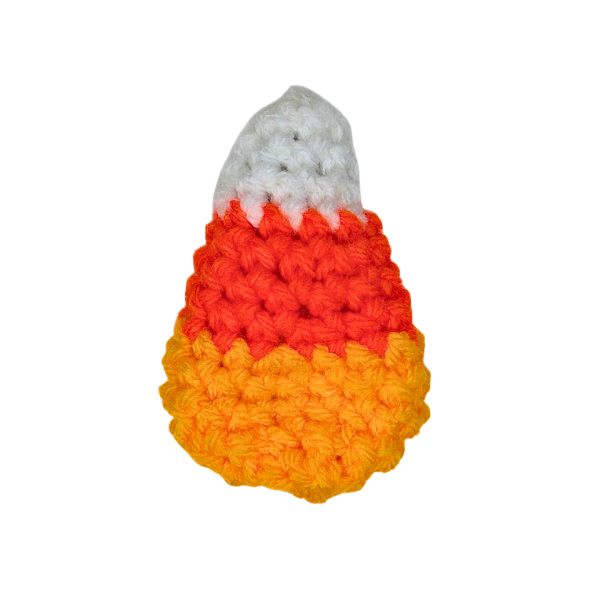
• Snap Candy Corn

    This pattern is part of my Halloween Snap Fidget Bundle patterns. Inside each fidget is a 2 inch snap hair clip, when secured closed, it creates a fun fidget toy. Halloween Snap Fidget Bundle PDF

    Materials

    • Medium weight yarn
    • Size 3.5 mm (E) hook
    • Tapestry Needle
    • 2 inch snap hair clip
    • Fingering weight yarn or thread
    • Poly fil (optional)

    Stitches

    • sc – single crochet
    • inc – single crochet increase
    • dec – single crochet decrease

    This pattern was made with the yarn under, yarn over technique.

    After inserting your hook through the stitch grab the yarn so that it is under the hook (see picture) instead of wrapping it over the hook. This creates a shorter, denser stitch for amigurumi. It will affect gauge

    The pattern is worked in continuous rounds

    Hair clip

    Before using the hair clip inside the Candy Corn Snap, it must be secured close. I used fingering weight yarn but thread would do as well. Pull the yarn from underneath the hair clip, up through the gap, wrap around the side and go back underneath, wrap around the other side. Repeat this process ten times. Tie both ends to together in a secure knot. Then cut yarn. This should secure the hair clip closed.

    Candy Corn

    Worked continuously in rounds, place stitch marker at the start of round

    Starting with white

    Round 1: 6 sc in magic circle [6]

    Round 2: (inc, 2 sc) x 2 [8]

    Round 3: sc around [8]

    Round 4: (inc, 3 sc) x 2 [10]

    Switch to orange

    Round 5: sc around

    Round 6: (inc, 4 sc) x 2 [12]

    Round 7: sc around [12]

    Round 8: (inc, 5 sc) x 2 [14]

    Switch to yellow

    Round 9: (inc, 6 sc) x 2 [16]

    Round 10: sc around [16]

    Round 11: (inc, 7 sc) x 2 [18]

    Round 12: (sc, dec) x 6 [12]

    Add hairclip and stuffing (optional, it gives it a more padded look but makes the clip harder to snap, pattern picture is without stuffing)

    Round 13: (dec) x 6 [6]

    Fasten Off. Thread through the front loop of the remaining stitches and close up hole.

    Halloween Snap Fidget Bundle PDF

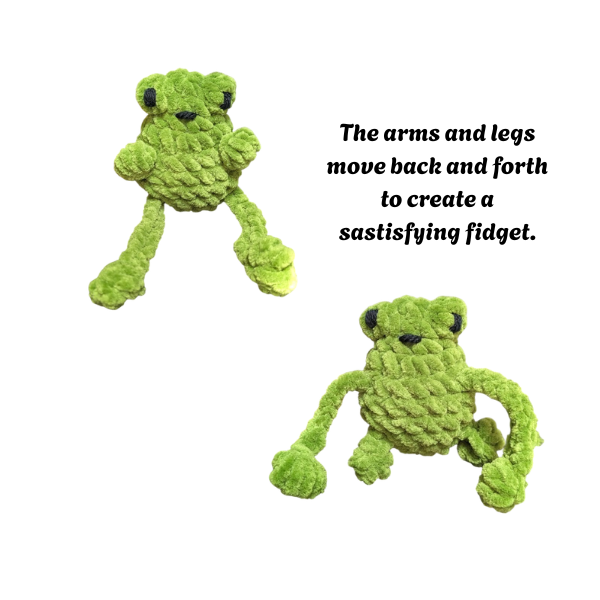
  • Fidget Frog

    Materials

    • Premier Parfait Chunky 17 yds
    • Size 4.0 mm hook
    • Plastic Tapestry Needle
    • Black Medium Weight Yarn for Embroidering Eyes and smile

    Stitches

    • sc – single crochet
    • inc – single crochet increase
    • dec – single crochet decrease
    • 4 dc bobble – yarn over, insert hook into stitch, yarn over, pull through the stitch, yarn over, pull through two loops on hook. Repeat until there are five loops on the hook. Yarn over and pull through all five loops
    • 5 dc bobble – yarn over, insert hook into stitch, yarn over, pull through the stitch, yarn over, pull through two loops on hook. Repeat until there are six loops on the hook. Yarn over and pull through all six loops

    This pattern was made with the yarn under, yarn over technique.

    After inserting your hook through the stitch grab the yarn so that it is under the hook (see picture) instead of wrapping it over the hook. This creates a shorter, denser stitch for amigurumi. It will affect gauge

    The pattern is worked in continuous rounds

    The finished object from this pattern is not intended for children under 3

    For the PDF Click Here

    Arms/Legs (Make 2)

    Chain 20

    Place a 4dc bobble in 3rd chain from hook, slip stitch into same chain as bobble (this anchors your bobble), slip stitch all the way down chain until last chain. In the last chain place a 4dc bobble, slip stitch back into chain to anchor bobble.

    Fasten Off. Weave in ends. Pop out bobble using your finger, just to get it a little rounder.

    Note: Weaving in ends is a challenge. I have found that knotting the two ends together weaving them down the length of the chain, knotting them again and then weaving them up the length of the chain in a different location than where you weaved them down.

    Frog

    Starting at the top of the head

    Round 1: 8 sc in magic circle [8]

    Round 2: 2 sc, 5dc bobble, 3 sc, 5dc bobble, sc [8]

    Round 3: (sc, inc) x 4 [12]

    Round 4: (sc, inc) x 6 [18]

    Round 5: 8 sc, chain 1, skip next stitch, 5 sc, chain 1, skip next stitch, 3 sc

    Note: Chain 1 space is where the legs and arms come out of the frog. You may need to adjust placement due to tension.

    Round 6: sc around, including in chain 1 spaces [18]

    Round 7: sc around [18]

    Round 8: 9 sc, chain 1, skip next stitch, 5 sc, chain 1, skip next stitch, 2 sc

    Round 9: (sc, dec) x 6 [12] Treat chain 1 stitches as normal, either placing a sc or using it as part of the decrease as needed.

    Place legs/arms in place through chain 1 spaces.

    Round 10: (sc, dec) x 4 [8]

    Stuff

    Fasten Off, close hole and weave in ends

    Eyes

    With the Black Acrylic Yarn, embroider two eyes.

    I make 3-4 horizontal stitches around the leg of a double crochet in the eye. Add a little smile

    Weave in ends.

    For the PDF Click Here

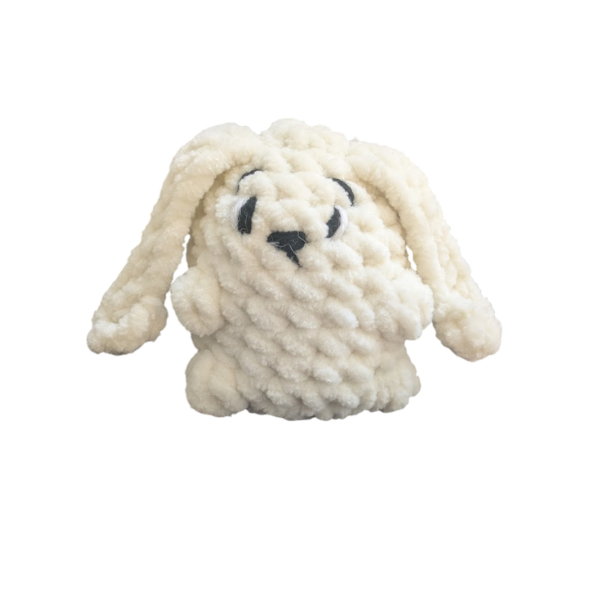
  • Fidget Bunny

    Materials

    • Premier Parfait Chunky 25 yds
    • Size 4.0 mm hook
    • Plastic Tapestry Needle
    • Black and White Acrylic Yarn for Embroidering Eyes and nose

    Stitches

    • sc – single crochet
    • inc – single crochet increase
    • dec – single crochet decrease
    • dc – double crochet
    • 3 dc bobble – yarn over, insert hook into stitch, yarn over, pull through the stitch, yarn over, pull through two loops on hook. Repeat until there are four loops on the hook. Yarn over and pull through all four loops
    • 4 dc bobble – yarn over, insert hook into stitch, yarn over, pull through the stitch, yarn over, pull through two loops on hook. Repeat until there are five loops on the hook. Yarn over and pull through all five loops

    This pattern was made with the yarn under, yarn over technique.

    After inserting your hook through the stitch grab the yarn so that it is under the hook (see picture) instead of wrapping it over the hook. This creates a shorter, denser stitch for amigurumi. It will affect gauge

    The pattern is worked in continuous rounds, except the ears

    The finished object from this pattern is not intended for children under 3

    For the PDF Click Here

    Ears

    Chain 20

    In the 3rd chain from the hook 4dc, sc down the chains until the last chain. In the last chain place 4dc.

    Fasten Off. Weave in ends.

    Note: Make sure you securely weave in the ends since the ears will be pulled back and forth, itโ€™s easy for the ends to come out.

    Bunny

    Worked Continuously

    Starting at the top of the head

    Round 1: 8 sc in magic circle [8]

    Round 2: (sc, inc, chain 1, skip next stitch, inc) x 2 [12]

    Round 3: (sc, inc) x 6 [18] Treat chain 1 stitches as normal, placing an increase

    Rounds 4-6: sc around [18] 3 rounds

    Put ears through the chain 1 spaces from round 2

    Round 7: 7 sc, 4dc bobble, 5 sc, 4dc bobble, 4 sc [18]

    Rounds 8-9: sc around [18] 2 rounds

    Note: You may have to adjust bobble placement by a stitch or two due to tension. The 3dc bobble is the tail so it should be in the middle of the back of the bunny.

    Round 10: 2 sc, 3dc bobble, 5 sc, 4dc bobble, 5 sc, 4dc bobble, 3 sc [18]

    Round 11: (sc, dec) x 6 [12]

    Stuff

    Round 12: (dec) x 6 [6]

    Fasten Off, Weave in end

    Eyes

    With the Black Acrylic Yarn at rd 4, embroider two eyes and a nose. Add a little white highlight to the eyes.

    Weave in ends.

    For the PDF Click Here

  • Unicorn Headband

    Materials

    • Sweet Snuggles Lite (33 yds white, 7 yds yellow, mane + forelock 9 yds per color)
    • Size 4.5 mm hook
    • Tapestry needle
    • 1 inch wide Plastic Headband
    • Poly Fil

    Stitches

    • sc – single crochet
    • inc – single crochet increase
    • dec – single crochet decrease
    • ch – chain
    • sl st – slip stitch

    Gauge

    13 stitches and 10 rows per 4 inches

    This pattern was made with the yarn under, yarn over technique.

    After inserting your hook through the stitch grab the yarn so that it is under the hook (see picture) instead of wrapping it over the hook. This creates a shorter, denser stitch for amigurumi. It will affect gauge

    The pattern is worked in continuous rounds

    The finished object from this pattern is not intended for children under 3

    For the PDF Click Here

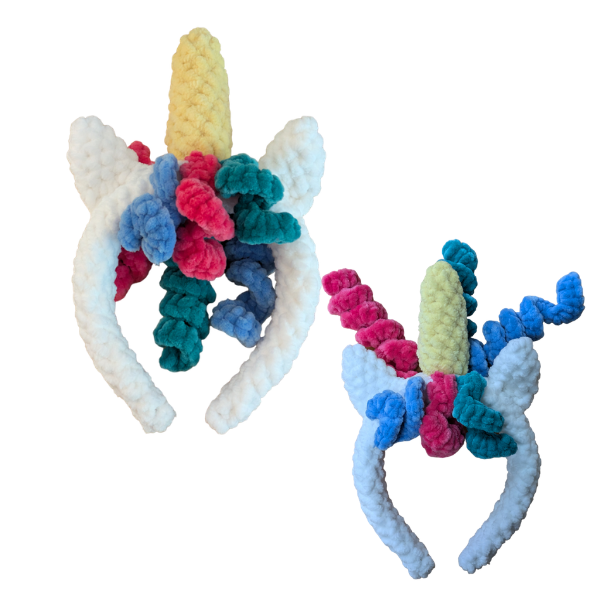
    Ears (Make 2)

    Using White Yarn

    Round 1: 4 sc in magic circle [4]

    Round 2: (sc, inc) x 2 [6]

    Round 3: (2sc, inc) x 2 [8]

    Rounds 4-5: sc around [8] 2 rounds

    Sc through both sides of the ear

    Fasten Off. Do not stuff. Leave a long tail for sewing.

    Horn

    Using Yellow Yarn

    Round 1: 4 sc in magic circle [4]

    Round 2: (sc, inc) x 2 [6]

    Round 3: sc around [6]

    Round 4: (2sc, inc) x 2 [8]

    Rounds 5-6: sc around [8] 2 rounds

    Round 7: (3sc, inc) x 2 [10]

    Rounds 8-10: sc around [10] 3 rounds

    Fasten Off. Stuff. Leave a long tail for sewing.

    Mane (Make 3)

    Chain 21 stitches. In 2nd chain from hook, 3sc. In each remaining stitch 3sc.

    Fasten Off. Leave a long tail for sewing.

    Forelocks (Make 3)

    Chain 11 stitches. In 2nd chain from hook, 3sc. In each remaining stitch 3sc.

    Fasten Off. Leave a long tail for sewing.

    Headband

    Round 1: 4 sc in magic circle [4]

    Rounds 2-3: sc around [4] 2 rounds

    Round 4: (sc, inc) x 2 [6]

    Rounds 5-9: sc around [6] 5 rounds

    Double check sizing by putting headband into covering, see how it fits.

    Round 10: (2 sc, inc) x 2 [8]

    Rounds 11-15: sc around [8] 5 rounds

    Round 16: (3 sc, inc) x 2 [10]

    Rounds 17-28: sc around [10] 12 rounds

    Round 29: (3 sc, dec) x 2 [8]

    Rounds 30-34: sc around [8] 5 rounds

    Round 35: (2 sc, dec) x 2 [6]

    Rounds 36-40: sc around [6] 5 rounds

    Place Headband inside, fully stretching crochet over the headband. See pictures.

    Round 41: (sc, dec) x 2 [4]

    Rounds 42-43: sc around [4] 2 rounds

    The number of rounds will vary based on tension. You may have to add or decrease the number of rounds to get it to fit.

    Assembly

    Line the horn up with the middle of the headband, sew it on.

    Sew the ears, leaving one to two rounds between the horn and ear.

    Attach the back mane and the forelocks.

    Enjoy!!

    For the PDF Click Here

  • Octopus Headband

    Materials

    • Sweet Snuggles Lite (27 yds to cover headband, 45 yds for octopus)
    • Size 4.5 mm hook
    • Tapestry needle
    • Plastic Headband ( 1 inch wide)
    • Poly Fil
    • Safety Eyes (10 mm)

    Stitches

    • sc – single crochet
    • inc – single crochet increase
    • dec – single crochet decrease
    • ch – chain
    • flo – front loop only
    • sl st – slip stitch

    Gauge

    13 stitches and 10 rows per 4 inches

    This pattern was made with the yarn under, yarn over technique.

    After inserting your hook through the stitch grab the yarn so that it is under the hook (see picture) instead of wrapping it over the hook. This creates a shorter, denser stitch for amigurumi. It will affect gauge

    The pattern is worked in continuous rounds

    The finished object from this pattern is not intended for children under 3

    For the PDF Click Here

    Octopus

    Round 1: 8 sc in magic circle [8]

    Round 2: (inc) x 8 [16]

    Round 3: (sc, inc) x 8 [24]

    Round 4-6: sc around [24] 3 rounds

    Round 7: (sc, dec) x 8 [16]

    Note: Place a stitch marker in the back loop of the first stitch of Round 8.

    Round 8: FLO (sl st, ch 11, in 2nd chain from hook 3sc, 3sc in remaining chains, sl st back into original stitch, sl st into next stitch) x 8

    Add Safety Eyes, I placed mine on Round 5 with 3 stitches between the eyes

    Round 9: In the back loops of round 8 (dec) x 8 [8]

    Stuff Firmly

    Fasten Off. Close up hole, thread through the front loop of the remaining stitches and pull closed.

    Leave a long tail for sewing.

    Headband

    Round 1: 4 sc in magic circle [4]

    Rounds 2-3: sc around [4] 2 rounds

    Round 4: (sc, inc) x 2 [6]

    Rounds 5-9: sc around [6] 5 rounds

    Double check sizing by putting headband into covering, see how it fits.

    Round 10: (2 sc, inc) x 2 [8]

    Rounds 11-15: sc around [8] 5 rounds

    Round 16: (3 sc, inc) x 2 [10]

    Rounds 17-28: sc around [10] 12 rounds

    Round 29: (3 sc, dec) x 2 [8]

    Rounds 30-34: sc around [8] 5 rounds

    Round 35: (2 sc, dec) x 2 [6]

    Rounds 36-40: sc around [6] 5 rounds

    Place Headband inside, fully stretching crochet over the headband. See pictures.

    Round 41: (sc, dec) x 2 [4]

    Rounds 42-43: sc around [4] 2 rounds

    The number of rounds will vary based on tension. You may have to add or decrease the number of rounds to get it to fit.

    Fasten Off. Close up hole and weave in end.

    Assembly

    Add a little mouth to the octopus using black yarn.

    Sew the octopus to the top of the headband. I like to put it a little off center.

    Enjoy!!

    For the PDF Click Here

  • Frog on a Lilypad Headband

    Materials

    • Sweet Snuggles Lite (27 yds)
    • Premier Parfait Chunky (Lilypad 14 yds, frog 11 yds)
    • Size 4.0 & 4.5 mm hook
    • Tapestry needle
    • Plastic Headband (1 inch wide)
    • Poly Fil
    • Black Medium Weight Yarn for Eyes

    Stitches

    • sc – single crochet
    • inc – single crochet increase
    • dec – single crochet decrease
    • ch – chain
    • sl st – slip stitch
    • 5 dc bobble – yarn over, insert hook into stitch, yarn over, pull through the stitch, yarn over, pull through two loops on hook. Repeat until there are six loops on the hook. Yarn over and pull through all six loops

    Gauge

    13 stitches and 10 rows per 4 inches

    This pattern was made with the yarn under, yarn over technique.

    After inserting your hook through the stitch grab the yarn so that it is under the hook (see picture) instead of wrapping it over the hook. This creates a shorter, denser stitch for amigurumi. It will affect gauge

    The pattern is worked in continuous rounds, unless otherwise noted, like on the lilypad

    The finished object from this pattern is not intended for children under 3

    For the PDF Click Here

    Frog

    Using Premier Yarn and 4.0mm hook

    Round 1: 8 sc in magic circle [8]

    Round 2: 2sc, 5dc bobble, 3sc, 5dc bobble, sc [8]

    Round 3: (sc, inc) x 4 [12]

    Round 4: (sc, inc) x 6 [18]

    Round 5-6: sc around [18] 2 rounds

    Note: You may need to adjust your bobble placement due to tension. The first bobble should line up with the side of the eye bobble.

    Round 7: 6sc, 5dc bobble, 2sc, 5dc bobble, 3sc, 5dc bobble, 2sc, 5dc bobble, sc [18]

    Round 8: (sc, dec) x 6 [12]

    Round 9: dec x 6 [6]

    Stuff Firmly, close hole and fasten off but leave a tail for sewing

    Lily Pad

    Using Premier Yarn and 4.0mm hook

    Note: Rounds 1 and 2 are done continuously, so place a marker in the first stitch. Round 3-6 are turned, so at the start of the round, chain 1, turn work.

    Round 1: 8 sc in magic circle [8] Leave a long tail for sewing

    Round 2: inc x 8 [16]

    Round 3: Chain 1, turn (sc, inc) x 8 [24]

    Round 4: Chain 1, turn (2sc, inc) x 8 [32]

    Round 5: Chain 1, turn (3sc, inc) x 8 [40]

    Round 6: Chain 1, turn (4sc, inc) x 8 [48]

    Fasten Off. Weave in final end, do not weave in the tail from the 1st round.

    Headband

    Using Sweet Snuggles Yarn & 4.5mm hook

    Round 1: 4 sc in magic circle [4]

    Rounds 2-3: sc around [4] 2 rounds

    Round 4: (sc, inc) x 2 [6]

    Rounds 5-9: sc around [6] 5 rounds

    Double check sizing by putting headband into covering, see how it fits.

    Round 10: (2 sc, inc) x 2 [8]

    Rounds 11-15: sc around [8] 5 rounds

    Round 16: (3 sc, inc) x 2 [10]

    Rounds 17-28: sc around [10] 12 rounds

    Round 29: (3 sc, dec) x 2 [8]

    Rounds 30-34: sc around [8] 5 rounds

    Round 35: (2 sc, dec) x 2 [6]

    Rounds 36-40: sc around [6] 5 rounds

    Place Headband inside, fully stretching crochet over the headband.

    Round 41: (sc, dec) x 2 [4]

    Rounds 42-43: sc around [4] 2 rounds

    The number of rounds will vary based on tension. You may have to add or decrease the number of rounds to get it to fit.

    Fasten Off. Close up hole and weave in end.

    Assembly

    Using Black Acrylic Yarn. Embroider eyes using 3 horizontal stitches in the eye bobble.

    Add a little smile

    Sew the frog to the lily pad.

    Sew the lily pad to the top of the headband. I like to put it a little off center.

    Enjoy!!

    For the PDF Click Here

  • Cat Snap Bracelet

    Materials

    • Sweet Snuggles Lite (45 yds MC, 11 yds CC)
    • Size 4.5 mm hook
    • Tapestry needle
    • Two Snap Bracelets
    • Poly Fil
    • Acrylic yarn for nose/mouth/blush
    • Safety Eyes (10mm)

    Stitches

    • sc – single crochet
    • inc – single crochet increase
    • dec – single crochet decrease
    • sl st – slip stitch

    This pattern was made with the yarn under, yarn over technique.

    After inserting your hook through the stitch grab the yarn so that it is under the hook (see picture) instead of wrapping it over the hook. This creates a shorter, denser stitch for amigurumi. It will affect gauge

    The pattern is worked in continuous rounds

    The finished object from this pattern is not intended for children under 3

    For the PDF Click Here

    Head

    MC Yarn (Main Color)

    Round 1: 8 sc in magic circle [8]

    Round 2: (inc) x 8 [16]

    Round 3: (sc, inc) x 8 [24]

    Round 4-7: sc around [24] 4 rounds

    Round 8: (sc, dec) x 8 [16]

    Add Safety Eyes, I placed mine between Rounds 5 & 6 with 3 visible stitches apart.

    Stuff Firmly

    Round 9: (dec) x 8 [8]

    Fasten Off. Close up hole, thread through the front loop of the remaining stitches, pull closed. leave a long tail, you will use it for sewing the head to the bracelet.

    Paws x 2

    MC Yarn

    Round 1: 6 sc in magic circle [6]

    Round 2-4: sc around [6] 3 rounds

    Sc both sides together

    Fasten Off. Do not stuff. Leave a long tail for sewing.

    Tail

    CC Yarn (Contrasting Color)

    Round 1: 8 sc in magic circle [8]

    MC Yarn

    Rounds 2-10: sc around [8] 9 rounds

    Sc both sides together

    Fasten Off. Leave a long tail for sewing.

    Ears x 2

    Main Color Yarn

    Round 1: 4 sc in magic circle [4]

    Round 2: (sc, inc) x 2 [6]

    Round 3: (2sc, inc) x 2 [8]

    Fasten Off. Sew ears on head between rounds

    Embroidery

    CC Yarn

    Add three stripes to the top of the head, between the ears.

    Using Black Acrylic Yarn a small nose/mouth.

    Add a little blush with pink yarn, if you would like.

    Snap Bracelet

    MC Yarn

    Round 1: 6 sc in magic circle [6]

    Round 2: (inc) x 6 [12]

    Rounds 3-5: sc around [12] 3 rounds

    CC Yarn

    Rounds 6-7: sc around [12] 2 rounds

    MC Yarn

    Rounds 8-10: sc around [12] 3 rounds

    CC Yarn

    Rounds 11-12: sc around [12] 2 rounds

    MC Yarn

    Rounds 13-15: sc around [12] 3 rounds

    CC Yarn

    Rounds 16-17: sc around [12] 2 rounds

    MC Yarn

    Rounds 18-20: sc around [12] 3 rounds

    CC Yarn

    Rounds 21-22: sc around [12] 2 rounds

    MC Yarn

    Rounds 23-27: sc around [12] 5 rounds

    Insert Snap Bracelets

    Round 28: (dec) x 6 [6]

    Fasten Off. Close up hole and weave in end.

    Assembly

    Sew head to the front of the bracelet. Sew tail to the back of the bracelet, mine is 4 rows from the end. Sew the paws to the front of the bracelet, I face them forward for the loafing position.

    For the PDF Click Here

  • Dog snap Bracelet

    Materials

    • Premier Parfait Chunky 65 yards
    • Size 4.0 mm hook
    • Tapestry needle
    • Two Snap Bracelets
    • Poly Fil
    • Acrylic Yarn for eyes and nose

    Stitches

    • sc – single crochet
    • inc – single crochet increase
    • dec – single crochet decrease

    This pattern was made with the yarn under, yarn over technique.

    After inserting your hook through the stitch grab the yarn so that it is under the hook (see picture) instead of wrapping it over the hook. This creates a shorter, denser stitch for amigurumi. It will affect gauge

    The pattern is worked in continuous rounds

    The finished object from this pattern is not intended for children under 3

    For the PDF Click Here

    Head

    Round 1: 6 sc in magic circle [6]

    Round 2: (inc) x 6 [12]

    Round 3: 4sc, (inc) x 4, 4sc [16]

    Round 4: 4sc, (sc, inc) x 4, 4sc [20]

    Round 5: 4sc, (2sc, inc) x 4, 4sc [24]

    Rounds 6-8: sc around [24] 3 rounds

    Round 9: (2sc, dec) x 6 [18]

    Round 10: (sc, dec) x 6 [12]

    Stuff Firmly

    Round 11: (dec) x 6 [6]

    Embroider two eyes using black acrylic yarn. Mine are on Round 4 with 5 to 7 stitches apart.

    Emboider a nose using brown acrylic yarn.

    Fasten Off. Close up hole and leave a long tail for sewing. Thread tail down to the bottom of head

    Arms & Ears (Make 4)

    Round 1: 6 sc in magic circle [6]

    Rounds 2-4: sc around [6] 3 rounds

    Sc through both sides of the arm/ear

    Fasten Off. Do not stuff. Leave a long tail for sewing.

    Tail

    Round 1: 6 sc in magic circle [6]

    Round 2: (sc, inc) x 3 [9]

    Round 3-10: sc around [9] 8 rounds

    Stuff Tail Lightly

    Sc through both sides of the tail

    Fasten Off. Leave a long tail for sewing.

    Snap Bracelet

    Round 1: 6 sc in magic circle [6]

    Round 2: (inc) x 6 [12]

    Round 3-30: sc around [12] 28 rounds

    The number of rounds will vary based on tension. Crochet up to the far end of the snap bracelets.

    Round 31: (dec) x 6 [6]

    Fasten Off. Close up hole and weave in end.

    Assembly

    Using the tail from the ears, sew to the top of head, in line with the eyes.

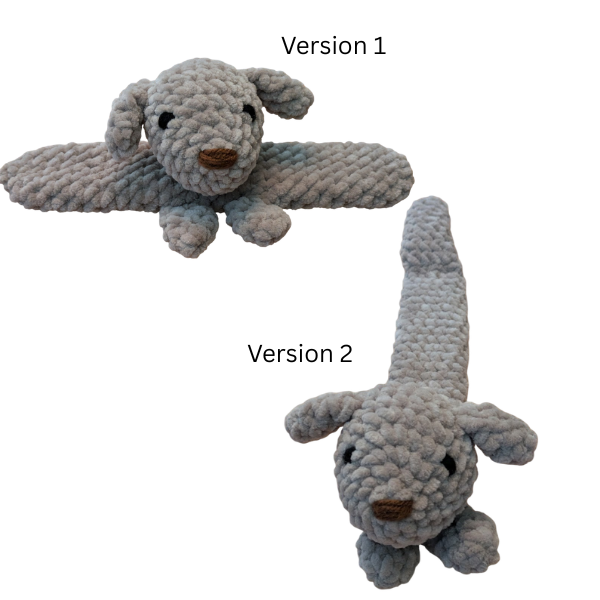
    There are two versions for this snap bracelet.

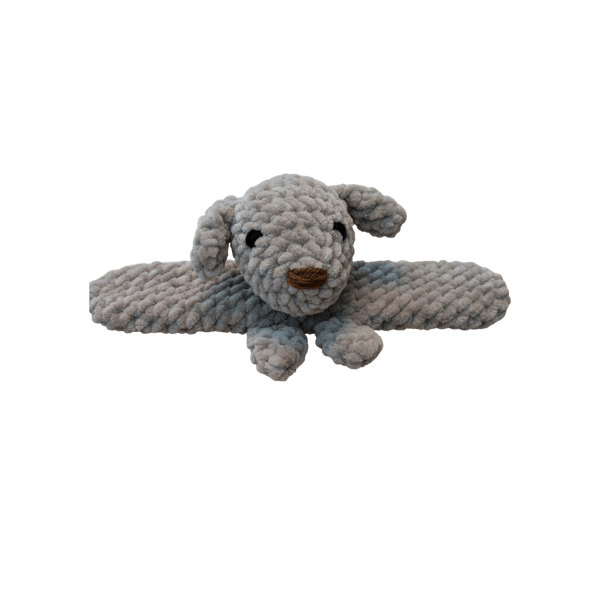
    Version 1

    The head is sewn to the middle of the snap bracelet. The paws and tail are sewn to the snap bracelet, directly below the head.

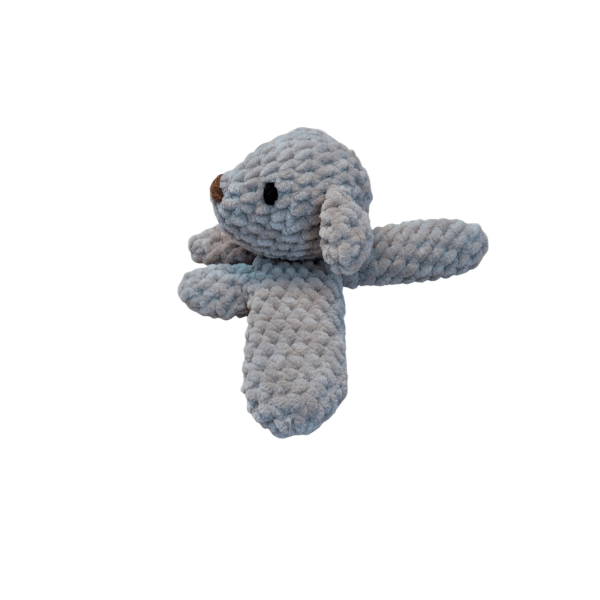
    Version 2

    The head is sewn to the end of the snap bracelet. The paws are sewn to the snap bracelet directly below the head. The tail is sewn to the back of the snap bracelet.

    For the PDF Click Here

  • Fox Snap Bracelet

    Materials

    • Premier Parfait Chunky (orange 65 yd, black 7yds, white 12 yds)
    • Size 4.0 mm hook
    • Tapestry needle
    • Two Snap Bracelets
    • Poly Fil
    • Medium Weight Yarn for nose
    • Safety Eyes (10 mm)

    Stitches

    • sc – single crochet
    • inc – single crochet increase
    • dec – single crochet decrease

    This pattern was made with the yarn under, yarn over technique.

    After inserting your hook through the stitch grab the yarn so that it is under the hook (see picture) instead of wrapping it over the hook. This creates a shorter, denser stitch for amigurumi. It will affect gauge

    The pattern is worked in continuous rounds

    The finished object from this pattern is not intended for children under 3

    For the PDF Click Here

    Head

    Orange Yarn

    Round 1: 8 sc in magic circle [8]

    Round 2: (inc) x 8 [16]

    Round 3: (sc, inc) x 8 [24]

    Round 4: (2sc, inc) x 8 [32]

    Rounds 5-7: sc around [32] 3 rounds

    Switch to White Yarn

    Rounds 8-9: sc around [32] 2 rounds

    Round 10: (2sc, dec) x 8 [24]

    Round 11: (sc, dec) x 8 [16]

    Add Safety Eyes, I placed mine on Round 6 with 5 stitches between the eyes

    Round 12: (dec) x 8 [8]

    Stuff Firmly

    Fasten Off. Close up hole and leave a long tail for sewing.

    Arms (Make 2)

    Black Yarn

    Round 1: 6 sc in magic circle [6]

    Switch to Orange Yarn

    Rounds 2-3: sc around [6] 2 rounds

    Sc through both sides of the arm

    Fasten Off. Do not stuff. Leave a long tail for sewing.

    Ears (Make 2)

    Black Yarn

    Round 1: 4 sc in magic circle [4]

    Round 2: (inc) x 4 [8]

    Switch to Orange Yarn

    Round 3: (sc, inc) x 4 [12]

    Rounds 4-5: sc around [12] 2 rounds

    Fasten Off. Do not stuff. Leave a long tail for sewing.

    Nose

    Orange Yarn

    Round 1: 4 sc in magic circle [4]

    Round 2: (inc) x 4 [8]

    Round 3: (sc, inc) x 4 [12]

    Round 4: sc around [12]

    Fasten Off. Add a tiny bit of stuffing. Leave a long tail for sewing.

    Tail

    White Yarn

    Round 1: 4 sc in magic circle [4]

    Round 2: (sc, inc) x 2 [6]

    Round 3: (inc) x 6 [12]

    Change to Orange Yarn

    Rounds 4-11: sc around [12] 8 rounds

    Stuff Tail

    Sc through both sides of the tail

    Fasten Off. Leave a long tail for sewing.

    Snap Bracelet

    Round 1: 6 sc in magic circle [6]

    Round 2: (inc) x 6 [12]

    Rounds 3-30: sc around [12] 28 rounds

    The number of rounds will vary based on tension. Crochet up to the far end of the snap bracelets.

    Round 31: (dec) x 6 [6]

    Fasten Off. Close up hole and weave in end.

    Assembly

    Sew Nose between the safety eyes, shaping it and adding stuffing as you go. Add a little bit of black embroidery to tip of nose.

    Using the tail from the ears, sew the sides together then sew to the top of head, from round 2 to round 6.

    There are two versions for this snap bracelet. Version 1 has the fox head in the middle, Version 2 has the fox head at the end

    Version 1

    The head is sewn to the middle of the snap bracelet. The paws and tail are sewn to the snap bracelet, directly below the head.

    Version 2

    The head is sewn to the end of the snap bracelet. The paws are sewn to the snap bracelet directly below the head. The tail is sewn to the back of the snap bracelet.

    Version 1 Version 2

    For the PDF Click Here

  • Axolotl Snap Bracelet

    Materials

    • Sweet Snuggles Lite (Main Color 55 yds, CC 7 yds)
    • Size 4.5 mm hook
    • Tapestry needle
    • Two Snap Bracelets
    • Poly Fil
    • Safety Eyes (10 mm)

    Stitches

    • sc – single crochet
    • inc – single crochet increase
    • dec – single crochet decrease
    • sl st – slip stitch

    This pattern was made with the yarn under, yarn over technique.

    After inserting your hook through the stitch grab the yarn so that it is under the hook (see picture) instead of wrapping it over the hook. This creates a shorter, denser stitch for amigurumi. It will affect gauge

    The pattern is worked in continuous rounds

    The finished object from this pattern is not intended for children under 3

    For the PDF Click Here

    Head

    Main Color Yarn

    Round 1: 8 sc in magic circle [8]

    Round 2: (sc, inc) x 4 [12]

    Round 3: (sc, inc) x 6 [18]

    Round 4: sc around [18]

    Round 5: (2sc, inc) x 6 [24]

    Rounds 6-7: sc around [24] 2 rounds

    Round 8: (2sc, dec) x 6 [18]

    Round 9: (sc, dec) x 6 [12]

    Turn head so the starting stitch marker is at the bottom. Add Safety Eyes, I placed mine between Rounds 3 & 4.

    Stuff Firmly

    Round 10: (dec) x 6 [6]

    Fasten Off. Close up hole, thread through the front loop of the remaining stitches, pull closed. leave a long tail and pull to the bottom of head, you will use it for sewing the head to the bracelet.

    Head Fins

    Contrasting Color Yarn

    Attach yarn to head between rounds 6 & 7, below eye level on the left side, work going up to the top of the head. On the right side, line it up with the top fin of the left side, work down to the base of the head.

    (Chain 3, sl st in 2nd chain from hook, sl st in next chain, sl stitch into the next stitch on the axolotl) x 3

    Fasten Off. Weave in ends.

    Repeat on the other side, make sure you keep them in line with one another.

    Tail

    Main Color Yarn

    Round 1: 6 sc in magic circle [6]

    Round 2: (sc, inc) x 3 [9]

    Round 3: (2sc, inc) x 3 [12]

    Rounds 4-5: sc around [12] 2 rounds

    Stuff

    Sc both sides together

    Fasten Off. Leave a long tail for sewing.

    Snap Bracelet

    Main Color Yarn

    Round 1: 6 sc in magic circle [6]

    Round 2: (inc) x 6 [12]

    Rounds 3-27: sc around [12] 25 rounds

    The number of rounds will vary based on tension. Crochet up to the far end of the snap bracelets.

    Round 28: (dec) x 6 [6]

    Fasten Off. Close up hole, thread through the front loop of the remaining stitches, pull closed and weave in end.

    Sew the head and tail to the bracelet.

    Legs (Make 4)

    Main Color Yarn

    Attach the yarn to the side of the snap bracelet between rows 10 & 11, counting from the head end.

    Chain 5

    Sc in 2nd chain from hook, sl stitch into 3rd chain from hook.

    (Chain 2, sc in 2nd chain from hook, slip stitch back into original stitch) x 2

    Slip stitch down the last two stitches of the original chain, slip stitch back into original stitch on the bracelet.

    Fasten Off. Weave in ends.

    Move down 8 stitches from the front leg, repeat process for the back leg. Then repeat on the other side.

    Spine

    Contrasting Color Yarn

    Attach the yarn to the middle of the tip of the tail.

    (Chain 3, Sc in 2nd chain from hook, leave last chain unworked, sl stitch into the bracelet the next stitch up toward the head.) repeat until you reach between rounds 6 & 7, counting back from the front end of the bracelet.

    Fasten Off, Weave in Ends.

    For the PDF Click Here